
Today I thought I would treat my girls (our pet sugar gliders, Petrie and Pearl) to some new furniture!
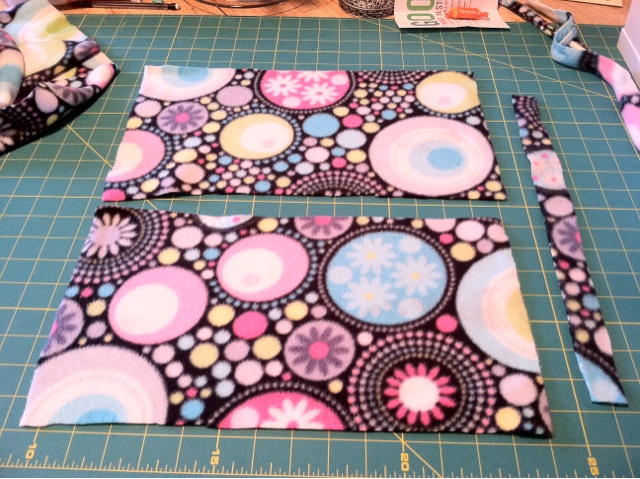
I started out with two large rectangles of fleece (I used 8"x14") and a 1" strip. I Folded the rectangles in half (hamburger style) right sides together. Sewed up the sides of both and trimmed the edges. DONT sew along the top! you should have one edge open, making two pouches.

Next I turned one right side out and put it inside the other. (so now right sides were together on both "pouches") I used 1" strips to make some loops, putting them in between the two before sewing them. (making sure the raw edges were matching, so the "loop" part was inside) I sewed the two together along the top edge, leaving about 2" unsewn to turn the pouch right-side out. Then I turned the pouch right sides out, and pinned the remaining two inches.

Next I top-stiched right along the top edge to finish the pouch (and close the last two inches)
And There we go! a finished glider pouch! Done in no more than 15 minutes!


Awesome DIY! You're putting it on Pinterest, right? ;)
ReplyDeleteGood idea Carrie!!
DeleteThat’s a pretty pouch. And judging by the expression on your sugar glider, it seems to me that they really love it! It’s good to see that you and your pets are having a great time. How are they?
ReplyDeletePriscilla